

When you need to mount a fixture or hang a shelf, your drill is one of the best tools to have. However, when it comes to tile, even this reliable tool can struggle a bit. Drilling through tile can present some unique challenges. If you aren’t careful, you can end up with unsightly cracks. To get the best results, you need to take your time and find the right Dremel drill bits. Our guide on how to drill through tile without cracking will make it easy to complete your next project.
When Will You Need to Drill Through Tile?
Drilling through tile is a little unusual, so plenty of experienced DIYers never do it. However, once you get into kitchen or bathroom customization, you’ll start to encounter plenty of reasons for drilling tile. Ultimately, there are all sorts of situations in which knowing how to drill a hole in ceramic tile will be useful.
The most frequent reason for needing to drill tile is to install bathroom fixtures. Things like faucets and handles may need to be screwed into place. Having the ability to drill tile also comes in handy when mounting shelves, safety bars, and other accessories. Screwing these sorts of things into a predrilled hole ensures they don’t slip out of place. As tiled walls and backsplashes become trendier, you may also encounter reasons to bring your drill into the kitchen. Mounting lights, securing shelves, and hanging pictures may all require knowing how to drill a hole in ceramic tile.
Common Problems Associated With Drilling Into Tile
Why is drilling through tile any different from drilling into a wall or a piece of wood? Tile tends to be both harder and more brittle than other common materials. It is so hard that you really don’t have the option of drilling by hand. Instead, you’ll need to use an electric drill with a specialized bit. Expect drilling through tile to take a little more effort and strength than standard drilling.
It can be tricky to get the drill into the tile at first. Especially if you have a glossy, glazed tile, the drill bit might skid around a little. This can make it hard to drill into the exact spot the project demands. Since most things you screw onto tile need to be precisely placed, this can be a major problem.
After you get your drill bit to penetrate the tile, you might run into a new set of issues. Tile is sturdy and resistant to damage. However, drills create subtle vibrations that can damage the material. This can result in chips in the glaze or huge cracks running through the tile. If you rush things and use the wrong technique, you can end up destroying your tile. Tile cracks are a major pain to fix because you can’t just add spackle and paint over them. It’s not the end of the world if you crack your tile, but you will need specialized epoxy to fix it.
How to Find the Right Drill Bits for Tile
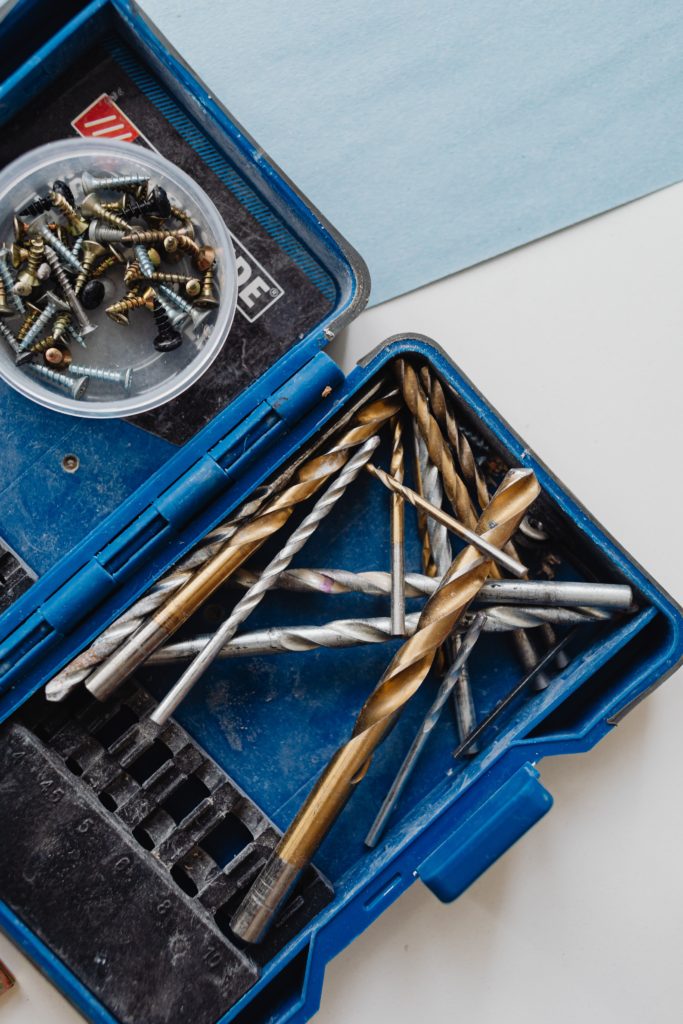
The key to drilling through ceramic tile is selecting the right bit. First of all, you need to make sure your drill bit isn’t worn out or old. If a drill bit has worn down a little, it won’t cut through the tile as cleanly. Next, you need to make sure you’re using a specifically designed drill bit for ceramic tile. Regular drill bits are designed for moving through wood. When used on tile, they tend to create a very rough hole, and the excess pressure of the bit may make the tile crack. You will need a carbide or diamond-tipped bit instead.
Fortunately, with the right equipment, ceramic tiles aren’t too hard to drill through. Unlike porcelain or natural stone, ceramic isn’t a super tough surface. Though you’ll still need specialized Dremel drill bits, you won’t necessarily need to invest in diamond-tipped bits. What is the best drill bit for ceramic tile? A standard carbide bit will work well. These bits are made of high carbon steel with a tungsten carbide coating. Though diamond-tipped bits aren’t necessary, they do work well for ceramic tile. If you already have a diamond bit, there is no need to go out and get a carbide bit just for ceramic drilling.
Just about any carbide bit will have the strength to get through basic ceramic tile. However, if you want an extra effective experience, select a masonry bit instead of a wood bit. Masonry drill bits have slightly thicker threads than wood drill bits. This makes them ideal for working with ceramic tile because they can grind through this tough material.

- HIGH QUALITY DRILL BIT SET; TITGGI Masonry drill bit set, industrial strength carbide drill bit tip, excellent abrasion resistance, make the drilling much more easier. this cement drill bits can easily penetrate various material (glass, ceramic, cement, wood, brick, travertine, hard plastic, etc.)
- FAST PENETRATION; This masonry bit is suitable for most general drill, electric drill, hand drill and bench drill, the double U-type groove slot design brings fast drilling dust remove, and 3-flats shank allows drill bit easy plug and to be held tightly, strong tungsten carbide drill bit tip and longer service life of TITGGI masonry drill bit.
- SATISFY ALL YOU DEMAND; Package includes 10 Pcs drill bit set: 1/8", 5/32", 3/16", 1/4", 1/4", 1/4", 1/4", 5/16", 3/8", 1/2", there are 10 differenct cement drill bit sizes, that will help in drilling by starting with the smallest bit and continuing to the size needed.
- PROFESSIONAL MASONRY BIT, WIDELY USED; TITGGI masonry drill bits, ideal for drilling fastner holes in bathroom tiles, ceramic drill bits for pots, or wall mirrors, can easily drill holes on tile, concrete, brick, glass, ceramic, wood, and reduces breakout, please cooling with water and control the speed when drilling.
- WORRY FREE! For genuine masonry drill bit, please identify TITGGI brand concrete drill bit set, international tool brands with guaranteed quality. If you're not satisfied with our Drill Bit Set, we will offer you premium customer service! Feel free to ORDER NOW!

- Superior Diamond Grit Technology: Equipped with advanced diamond grit, these drill bits offer enhanced durability and speed, ideal for drilling through porcelain tile, glass, and ceramics.
- Precision Drilling for Delicate Surfaces: Designed for accuracy, our bits ensure clean, precise holes in fragile materials like glass, porcelain, and marble, reducing the risk of cracks or damage.
- Versatile & Compatible: Whether you're using a hand drill or a bench drill, our set is compatible with various drilling tools, making it perfect for both DIY enthusiasts and professional craftsmen.
- Comprehensive Range for Multiple Materials: This set includes a variety of sizes, catering to a wide range of applications from granite and quartz stone to ceramic tile and acrylic, ensuring you have the right bit for every task.
- Long-Lasting & Efficient: Our diamond drill bits are not only built for longevity but also designed for efficient and faster drilling, saving you time and effort in your construction or renovation projects.
How to Drill a Hole in Ceramic Tile
Now that you know a little about the process behind drilling into tile let’s take a look at the actual method. We’ve included a lot of information in our step-by-step guide, but don’t be intimidated. All the extra details are just to ensure the best results. Actually drilling through tile usually takes a few minutes at most. Here’s what you need to know about how to drill through tile without cracking it.
1. Identify the Type of Tile
Before you go any further, take a look at your tile, and confirm that it’s actually ceramic. Ceramic tile is the most common sort of tile in homes, but other types are possible. If the tile is clear and glossy, it is probably glass. Ceramic and porcelain can look similar, but porcelain is usually a little smoother. If you look at the edge, the porcelain’s tile color extends all the way through the body of the tile. You can still follow the basic steps of our guide if your tile isn’t ceramic. However, porcelain and glass tile will require a diamond drill bit. You’ll also need to go extra slow when drilling glass tile.
2. Gather Your Tools
The whole process is a lot easier if you make sure you have all the essentials before you start. To drill a hole into ceramic tile, you will need:
- A drill: Any well-crafted power drill can handle ceramic tile.
- Carbide or diamond drill bits: These are essential for drilling through the tile.
- Safety gear: Tile chips and dust can fly through the air while you drill. Protect your eyes with goggles, and consider wearing a dust mask.
- Tools for measuring: A level, tape measure, and tile marker can all help ensure that you drill in the correct spot.
- Masking tape: Masking tape can be helpful for ensuring that you drill in the right spot.
- Wood drill bit (optional): If you want to avoid dulling your carbide tips, you can switch to a standard bit once you punch through the tile.
3. Measure Carefully, and Mark Your Drilling Location
It’s a bit tricky to cover up holes in tile, so you don’t want to accidentally drill in the wrong spot. Take the time to very carefully measure where you want to drill. Use a tile marker to make a small dot where you want to drill. If necessary, use a level to make sure that whatever you are hanging will be level. When working on glossy tile, it can be helpful to put masking tape over your spot and mark the drill location on the tape. This helps create a little bit of friction, so the drill bit won’t skid when you begin. Make sure to double-check your measurements, and then you can start drilling.
4. Start Drilling Slowly
Now it’s time to actually begin drilling. Set your drill to the slowest possible speed. Using a high speed is ill-advised for multiple reasons. It makes it harder to control the location of your drill, and it also increases its temperature. Both of these problems can make your drill bounce around and crack the tile. Instead, try to drill slowly and steadily through the tile. You can speed up a little once you break through the top glaze, but avoid drilling at high speeds.
5. Maintain Even Pressure
As you slowly drill, press down firmly against the tile. The main cause of cracks is vibrations running through the tile, so avoid worsening the situation with uneven pressure. Instead, try to maintain the same amount of pressure throughout the drilling experience. Some people may find it hard to exert enough pressure with their arms and shoulders alone. If your drill isn’t going in, it’s OK to lean against the tool and push with your body weight. Extra pressure is fine as long as you keep it slow and steady.
Tips for Drilling Through Tile Without Cracking It
As long as you follow our tried and tested method, it’s possible to get great results. However, if you’re especially concerned about cracking the tile, you can add a few extra steps to protect it even more.
- If possible, make your holes in the center of the tile. The edges of ceramic tiles crack more frequently.
- Keep an eye out for overheating. Take regular breaks to check your drill bit and spray it with water to reduce heating.
- If you’re having trouble drilling in a precise spot, use a spring-loaded center punch to mark your drilling location. This can ding the tile glaze, which will help your bit settle into the correct spot.
- No matter how much you’re struggling to get through the tile, don’t use a hammer drill. The uneven pressure almost always cracks the tile.
- If you’re installing the tile before you drill it, use an anti-fracture membrane behind your tile. This helps absorb motion, so your tile will be less likely to crack when you install your fixtures.
- Keep going slow even after you get through the tile. Drilling too fast into the backing surface can still cause vibrations that crack the tile.
Tips for Creating Oversized Holes
For the most part, the process is the same regardless of whether you’re drilling a large or small hole. However, if you need to create a hole that’s more than an inch wide, you need to take extra care. You can get special carbide hole saw bits. These are rotating circles that cut a large hole for pipes or other big fixtures.
If you don’t have a hole saw, you can use your tile marker to draw the correct circle size on the tile. Then use a quarter-inch bit to drill closely spaced holes along the interior edge of the circle. Once you have a ring of holes, use a hammer to gently break the tile free in the middle. This type of hole looks a little rough around the edges. Therefore, you should only use this technique when you plan to hide the edge with a decorative cover.
As you can see from our guide, drilling into tile doesn’t have to be confusing or tricky. With the right tools and techniques, it’s possible to drill even holes and avoid cracks. It can take a little time to get used to drilling in tile. However, once you learn, it’s a skill that will continue to come in handy.