

If you want to restore an old cabinet or refinish a new one, you’ll need to start by scraping the old finish off and smoothing out the surface. Sanding down your cabinet can be a tedious and tiring project, especially if you try to do it by hand or with the wrong tool.
Orbital sanders are the quickest and most energy-efficient way to get the sanding out of the way and leave your cabinet’s surface slick and ready for that last coat of shine. Their circular pattern of movement does a miraculous job of evening out irregular surfaces without too much elbow grease from you.
Here’s a guide to the tools and techniques you’ll need for the sanding phase of cabinet restoration. We’ll give you some tips and tricks for prepping your surface, then finish by telling you how to finish them with a flourish.
What Is an Orbital Sander?
There are many different kinds of orbital sanders with different sizes, speeds, orbits, and configurations. What sets orbital sanders apart from sheet sanders is that the sanding pad underneath is shaped like a disc rather than a square or rectangle.
Orbital sanders generally spin at around 10,000 RPM. Some orbital sanders spin in a fixed circular motion. Others both spin and wiggle at the same, creating a random orbital motion that offsets the center by around an eighth of an inch. These are called random orbital sanders.
A random orbital sander is the best sander for finishing work where a fine touch is needed. For rough work where previous finishes or other kinds of residue need to be removed, the best orbital sander to use is one with a regular circular pattern.
Where most sheet sanders use about a quarter of a sheet of regular sandpaper as their abrasive, orbital sanders use distinctive disc-shaped sandpaper. These usually attach to the sander via glue or Velcro and cost a little more than normal sandpaper. Most orbital sanders use discs measuring 5″ or 6″ in diameter. Heavy-duty orbital sanders may use discs with diameters of up to 8″ or 9″.
Some kinds of orbital sanders come with holes in the head that vacuum up the sawdust as you sand. Some sander models come with their own hole punchers, but you may have to buy sandpaper discs with holes.

- POWERFUL - With a 2.8 amp motor and 13,000 orbits per minute, it's able to deliver a smooth performance over a variety of sanding applications.
- EASY TO CLEAN DUST CONTAINER - The X-flow dust collector uses cyclone force to collect dust in it's easy-to-empty transparent container.
- SPEED CONTROL - Variable speed control provides the right amount of power and control across different materials.
- LOW VIBRATION - Through its ergonomic design and a soft rubber grip your hand stays comfortable while counterweight balance reduces hand fatigue from vibration. All so that you can work longer.
- SAND IN TIGHT PLACES - With a compact size and ergonomic design This sander can get into tight spaces easily and maximizes user control.
Different Cabinets Require Different Techniques
If your cabinet is made from solid wood or medium-density fiberboard (MDF), your orbital sander will work wonders. If your cabinet is made from laminate, you won’t be able to sand it without ruining the composite layer that acts as its skin. Even though laminate looks like wood, it’s basically the hot dog of wood, containing a mixture of wood and non-wood core materials.
If your cabinet has been stained, sealed, or painted, you’ll have to start by removing those layers. You can sand right through most thinner finish layers with the right sandpaper grit. Thicker finishes and most paints are better removed with a sturdy paint stripper.
What Kind of Sandpaper Grit Works Best?

Sandpaper comes in different grits, so make sure you use the right one for the job. The grit number lets you know how coarse the sandpaper is. Finer sandpapers have higher grit numbers, and coarser sandpapers have numbers on the lower end. Low-grit sandpapers are peppered with bigger abrasive specks, which sand things down faster and more roughly. High-grit sandpapers give you a more polished surface.
If your cabinet has an old finish or a light coat of paint that you want to remove, sandpaper with a coarse grit around 100 or 120 is rough enough to scratch off the outer layer quickly. When the outer layer rubs off, you can use finer sandpaper, like 180, for the main job and 220 for a smooth final round.

- Use it by hand, on a sanding block, or cut it to size for a power tool sander
- Aluminum oxide mineral
- Sands paint, wood, or metal
- Tough and durable
- 5/Pack
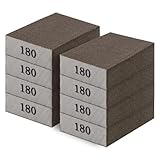
- 【VALUE PACK】 Each set contains 8 PCS 180 grit sandpaper block, each measuring 3.9 x 2.76 x 0.9 inches, this set of sandpaper block is perfectly suited for your daily life use.
- 【HIGH-QUALITY MATERIALS】These sanding sponge are made of high-density sponges, flexible, tear-resistant, and very durable. sanding block sand will not come off.
- 【VERSATILE APPLICATION】The different sanding blocks can be used for different abrasive projects in woodworking, furniture polishing, metal dusting, primer polishing, drywall, wood filler, and other finishes.
- 【WASHABLE and REUSABLE SANDPAPER BLOCK】This sanding sponge can be used wet or dry, these drywall sanding blocks are very versatile. sanding blocks can be used straight away or applied wet to the surface of an object for polishing, the sanding sponges both provide excellent polishing power while reducing the need for frequent cleaning, ultimately increasing your productivity.
- 【PROFESSIONAL SERVICES】We are confident in offering a 100% Satisfaction Guarantee as we are confident that you will be satisfied with our sand block. We are always striving to create a higher quality abrasive product line that offers superior abrasive performance, if there are any questions about this product, please feel free to contact us and we will resolve them for you within 24 hours!

- General purpose sandpaper
- Aluminum oxide mineral
- Sands paint, wood, or metal
- Follow the grain of the wood when sanding
- Skip no more than one grit in sanding sequence
Tools and Materials You’ll Need for Your Cabinet Restoration
Take a few minutes to gather the tools and materials you’ll need for the restoration process. This includes equipment for sanding, finishing, and personal protection.
Sanding Materials
- Orbital sander – You’ll do most of the work with your orbital sander, so the more powerful it is, the easier the job will be. You may want to use a heavy-duty DeWalt or Makita for the first few rounds, then pivot to a smaller model or sand by hand for the finishing touches.
- Sandpaper – Have a few grits on hand for different parts of the job: 100, 120, 180, and 220 should be enough. Make sure the sandpaper fits your orbital sander.
- Vacuum – Sanding your cabinet will produce quite a bit of sawdust, so cleaning up will be a lot easier if you have a dust extraction vacuum nearby.

- ❤【LARGER CAPACITY】Stanley SL18116P Wet / Dry Vacuum has a larger capacity over 22 L, makes small clean-up jobs a breeze for you as you don’t have to empty the bucket frequently any more.Runtime: 300.0 hours
- ❤【VERSATILE & POWERFUL】Thanks to the 4 peak HP motor, this vac offers powerful enough suction needed to almost any cleanup jobs in vehicle, jobsite, workshop, garage, basement, van, house, etc
- ❤【3 in 1 FUNCTION】With this versatile vac you can vacuum both wet liquid spills and dry debris, dust, saw, dirt or blow leaves away(use blower port), just organize the hose and power cord on top handle and side wraps after using, conveniently
- ❤【FARTHER CLEANUP】With over 16 ft of cleaning reach(6 ft hose, 10 ft power cord and 3 pieces of extension wands) it’s easy to do a farther cleanup for you without unplugging the unit, while it has four swivel casters for convenient and easy manoeuvrability
- ❤【WHAT YOU GET】Stanley SL18116P Wet / Dry Vac x 1, 1-1/4"x6’ super flexible hose x 1,extension wands x 3, gulper nozzle, floor nozzle x 1,crevice nozzle x 1,foam filter x 1, dust bag x 1, reusable dry filter x 1, 12-Month Warranty
- Tack cloth – This sticky, lightweight cloth will come in handy for wiping off any fine sawdust left on your cabinet before applying your finish.
- Set consists of 6 pieces - individually wrapped and generously sized painters tack cloths, each piece is 18 x 36 inches, made of premium yellow / gold cotton cheesecloth.
- Wax and silicone free, these anti-static soft cloths have just the right amount of tack to collect dirt, lint, dust, contaminants, giving you an outstandingly smooth surface ready for final finish.
- Set of Tack cloth for sanding – suitable for all finishes
- Open cloth and scrunch lightly to wipe away gently dirt, lint, dust, sawdust, contaminants, surface defect particles or any sanding residue for best pro finishing results
- Perfect for use by both hobbyist and professional with tack cloth automotive and tack cloth woodworking needs. Use after applying wax and grease remover for a mirror finish in auto painting.
- Plastic sheet or tarp – You can make the cleanup as easy as possible by spreading plastic sheeting or a tarp over your work space to catch all the flying particles and droplets.

- 1. Versatile Floor and Furniture Protection: More than just for painting, these durable plastic sheet protect floors, furniture, carpets, ceilings, wardrobes, and even cars from dirt and dust. Use them as furniture covers, rainproof outdoor covers, or to safeguard windows from weather damage
- 2. 12 x 9 Ft, 6-Pack for Maximum Coverage: These extra-large 12 x 9 ft (108 SQ. FT) plastic drop cloths provide extensive coverage, effortlessly fitting various types of furniture and guaranteeing that every corner and gap is well protected
- 3. Unfolds and spreads in seconds: This plastic sheeting is quick and easy to spread, making it perfect for a hassle-free setup whether you’re painting a room, protecting furniture, or covering large surfaces—saving you time and effort
- 4. Fearless Painting, No More Messes: Keep your home clean with our painting's plastic drop cloths. Painting supplies ensure a clean and flawless finish every time, so you can forget about worrying over stains during your painting projects
- 5. Sturdy Protection for a Clean Renovation: Designed to protect your floors and furniture, our polyethylene drop cloths and furniture covers keep everything neat and clean throughout your painting projects or renovation project
- Degreaser – A basic degreaser will help you remove any residue on the surface of your cabinet before you sand it. Tough grease comes off easily with a paint prep solution such as trisodium phosphate (TSP). Dishwashing liquid can also work in a pinch.

- ULTIMATE MULTI-PURPOSE MULTI-SURFACE POWER: Simplify your routine with STARPOWER, the ultimate universal cleaner degreaser that replaces multiple cleaning supplies, tackling grease, dirt, stains, oil, and grime throughout your home or workplace
- FOOD SAFE & FUME FREE: USDA-approved for food prep areas, providing a safe, mildly scented cleaning solution without harsh chemicals or solvents
- EXTREME CLEANING PERFORMANCE: From baked-on stains in your oven to grease on stoves, grime on engine parts, and graffiti on painted surfaces, STARPOWER’s industrial strength formula cuts through the toughest messes with ease
- NON TOXIC AND ECO FRIENDLY: The water-based, rinse-free formula is tough on grime but gentle on surfaces, delivering a green cleaning solution for all your household, automotive, and commercial cleaning needs
- VERSATILE INDOOR & OUTDOOR CLEANER: Whether it’s floors, sinks, car engines, kitchen appliances, or patio furniture, STARPOWER’s heavy duty concentrate replaces an arsenal of cleaning products while delivering powerful results you can see
Finishing Materials
- Brush, spray, or roller – Keep on hand whichever tool you’ll use to apply your finish.
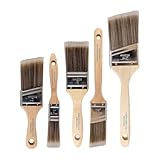
- COMPLETE 5-PIECE BRUSH SET FOR EVERY PAINTING TASK — Includes 1 Inch Flat, 1.5 Inch Angle, 2 Inch Flat, 2 Inch Angle Stubby, and 2.5 Inch Angle brush giving you every size professional painters use daily. Get all 5 for less than the price of a single brush from hardware store brands — professional grade performance at a fraction of the cost. Perfect for walls, trim, cabinets, doors, furniture, and detailed cutting-in work on any project.
- ZERO BRISTLE LOSS — GUARANTEED BY PRECISION ADHESIVE BONDING — Every bristle is locked in place with precision-set adhesive that keeps them in the brush — not in your paint job. The coated steel ferrule provides structural support while the adhesive bond ensures clean performance on every stroke. Premium SRT synthetic filaments load more paint and release it evenly for a smooth streak-free finish on walls, ceilings, and trim. Works with latex, oil-based paint, primer, sealer, and wood stain.
- INCLUDES THE ANGLE STUBBY MOST SETS LEAVE OUT — Professional painters know the 2 Inch Angle Stubby is the go-to brush for tight cabinet interiors, window sashes, inside corners, and detailed trim where standard angle brushes are too long. Combined with the 1.5 and 2.5 inch angle sash brushes you have precision cutting-in covered at every scale — baseboards, crown molding, door casings, and ceiling lines.
- FLAT BRUSHES FOR BROAD SMOOTH COVERAGE ON ANY SURFACE — The 1 and 2 inch flat brushes deliver even coverage on walls, furniture, shelving, doors, fences, decks, and wood surfaces. Ideal for applying primers, stains, varnishes, polyurethane, and specialty coatings. Solid wood handles provide all-day comfort and control for both professional contractors and weekend DIY homeowners tackling interior or exterior painting projects.
- TRUSTED BY PROFESSIONAL PAINTERS AND CONTRACTORS NATIONWIDE — Pro Grade delivers professional-grade results at a price that makes sense for crews who go through brushes on every job. Ideal for property managers, remodeling contractors, apartment turnover crews, maintenance teams, and commercial painting operations. Backed by thousands of verified reviews from working painters. Washable and reusable for multiple projects.
- Paint stripper – If you need to remove a previous layer of finish from your cabinet, a paint stripper can make the job a bit easier. It pulls the finish from the wood surface and gathers it into clumps.

- CITRISTRIP(R) Paint & Varnish Stripping & Removing Gel is easy to use.
- Stays wet and active for up to 24 hours allowing stripping of multiple layers in one step.
- Removes dried latex and oil-based paint, varnish, lacquer, polyurethane and shellac.
- Strips multiple layers from wood, metal and masonry surfaces.
- Contains no methylene chloride or NMP (N-Methylpyrrolidone).
- Putty knife – Once the old finish clumps up, you’ll need a putty knife to scrape off the residue.

- 【Multipurpose】5pcs Spackling Knives Different Sizes Are Available, Perfect for Putty, Wallpaper, Applique, Backing, Repair, Paint, Plaster, Including Drywall, Plaster, Baking, Spackling, Patching, Stucco and Much More, Can Be Used to Repair All Kinds of Dents, Cracks, Holes, Spackle Tool Suitable for Any Work Project
- 【Will Not Corrode】Putty Knives Use of High-quality Stainless Steel Material, not Rust, Solid Corrosion Resistance, Easy To Clean, no Need To Worry About Deformation And Breakage. Is The Perfect Metal Scraper Tool
- 【Comfortable Grip】The Handle Part Is A Perfect Combination Of Soft Rubber And Plastic, Retains Sturdiness And Durability While Ensuring A Comfortable Grip. Also Designed With Holes For Easy Storage
- 【Family Essentials】What You Get: 1inch Putty Knife, 2inch Putty Knife, 3inch Putty Knife, 4inch Putty Knife, And 5inch Putty Knife; come With 5 Different Sizes Meet Your Different Using Requirements, can Be Used As Paint Scraper Tool, Wallpaper Remover, Drywall Knife Set And Most
- 【Customer Commitment】our Commitment to Rerdeim Has Always Been Committed To Providing Customers With Higher Quality Products And A Comfortable Customer Experience. If You Have Any Concerns Or Questions About This Product, Please Feel Free To Contact Us
- Wood grain filler – If your cabinet is made of an open-grained wood like oak or mahogany, you may need to fill in the large pores for as smooth a surface as possible. Wood grain filler can flatten out any large holes, so you can apply your finish evenly.

- DESIGNED WITH EVERYONE IN MIND: From DIYers to contractors this is the perfect product to fill the grain and seal the pores of wood before or after staining or on raw wood to get a smooth finish on oak, ash, mahogany, walnut and other porous woods. A favorite product for tabletops, desktops, cabinets, vanities, millwork, pianos and guitars. For that glass smooth finish, start and finish all your hard to fill wood projects with Aqua Coat
- WATERBORNE AND ECO- FRIENDLY: Our entire line of products are MADE IN THE USA, low VOC, low odor, non-flammable, non-combustible, water-based fast drying, easy to apply, easy sanding, excellent adhesion, water clean up, environmentally friendly. This makes it the healthier option for your employees and your family. Achieve that beautiful glass smooth finish while keeping the environment and your health in mind.
- VERSATILE AND COMPATIBLE WITH OTHER PRODUCTS: Filling your wood grain before you stain not only creates that beautiful smooth finish you are looking to achieve it will also seal the pores and help minimize absorption of your top coat, saving you time and money. Aqua Coat Clear Grain Filler can be mixed with water soluble pigments/dyes.
- EASY TO USE- Work the Clear Grain Filler generously into open wood grain and pores against the grain with a small squeegee, bondo blade, old credit card, or fingers with a glove. Scrape off excess and let dry 45-60 minutes. VERY lightly sand with a 320 or higher grit sandpaper or a fine scotchbrite sanding pad immediately before your next application of grain filler. 2-3 coats are recommended
- LONG LASTING- A little goes a long way. You can use one quart to do 2 coats on a medium sized kitchen (30-40) drawers and doors. 1 pint used on 5-6 guitars.
- Wood putty – If you’re restoring an older cabinet full of dents and nicks, you can use wood putty to flatten out small imperfections before sanding.

- Gorilla tough: Gorilla Wood Filler is the go-to product for strong water resistant repairs on cracks, gouges and holes
- Natural finish: Our unique wood putty formula is easy to spread, allowing for a smooth natural finish
- Use indoors or outdoors: This wood filler putty is water resistant and does not shrink or crack, making it perfect for indoor or outdoor* projects and repairs
- Customizable: We want your wood repair to be the way you like it, so we made this wood filler paintable, stainable, and sandable
- Not just for looks: Gorilla wood putty filler also anchors nails and screws, making it a useful addition to your carpentry tools
- Mineral spirits or paint thinner – If the finish you plan to use is oil-based, keep a cup of mineral spirits or paint thinner nearby to clean your roller or brush.

Protective Equipment
Sanding fills the air around you with tiny particles. If you have to sand off a previous finish, those particles could include dangerous or hazardous chemicals. Working outside will give you plenty of fresh air, but you might not be able to keep the wind from blowing foreign particles all over your cabinet while you’re trying to work. If you work indoors, make sure your work space has plenty of ventilation, and don’t let your kids or pets hang around while you’re working.
Here are a few pieces of essential personal protective equipment (PPE) for cabinet restoration:
- Eye protection – A face shield or glasses can do the bare minimum to protect your eyes, but a pair of safety goggles with a good seal will do the most to keep dust out.

- DEWALT ToughCoat hard coated lens provides tough protection against scratches.
- DEWALT anti-fog lens coating provides tough protection against fogging.
- Soft, dual injected rubber conforms to the face to provide a high level protection from dust and debris.
- Adjustable, elastic cloth head strap provides a comfortable fit.
- Ventilation channels allow breathability and added protection against fogging.
- Ear protection – Depending on your ears and the kind of orbital sander you use, you might want to keep a pair of earplugs or earmuffs close by in case your ears start ringing.

- POWERFUL NOISE REDUCTION – Packing up to 24 dB (SNR) of noise reduction into a flexible silicone earplug, Quiet 2 muffles unwanted noise in comfort and style. Get in your quiet bubble anywhere for improved sleep, deep focus, stress-free travel and beyond. Quiet 2 earplugs qualify as certified hearing protection to keep your ears safe from damaging sounds.
- ULTRA-COMFY FIT – Made from lightweight, flexible silicone, these reusable earplugs offer dreamy comfort day and night, even for side-sleepers. Comes with 4 ear tip sizes (XS/S/M/L) for the perfect fit, even in smaller ears.
- GREAT FOR SLEEP, FOCUS AND MORE – Quiet 2 earplugs offer instant noise reduction and protection for all kinds of situations, including sleep, focus, relaxation, travel, commuting, general noise sensitivity and more. Loop earplugs are easy to clean and built to last.
- EASY TO USE – Quiet 2 earplugs are easy to insert and come with adjustable ear tip sizes for optimal noise reduction and a comfortable fit throughout the day. Just pop them in, twist to secure and enjoy life at your volume. When inserted correctly, Quiet 2 earplugs shouldn't stick out.
- IN THE BOX – 1 set of Loop Quiet 2 earplugs, 4 sets of Quiet 2 ear tips (sizes XS, S, M, L – M comes pre-installed), 1 portable convenient Carry Case.
- Breathing protection – If you’re sanding a small unfinished cabinet, you’ll probably be able to keep your respiratory system safe with a dust mask. For larger cabinets and fancy chemical stains, varnishes, and paints, you might want to use a respirator. Make sure to use the right filter in your respirator, depending on the particles you need to keep out. You can keep simple sawdust at bay with a particulate filter. If you need to apply or remove paint thinner, an epoxy-based resin, or lacquer, use a cartridge or filter designed to keep out organic vapors.

- ✔Notice that this is Non-medical KN95 face masks.Breathable KN95 face masks are made of two layers of non-woven cloth, two layers of melt-blown fabric, one layer of hot air cotton.
- ✔The 3D structure is designed according to the human face shape to ensure the tightness and safety. With soft elastic stretchable ear loop,which helps eliminate pressure on the ears for comfortable experience. Adjustable nose clip can help the mask perfectly attach onto your face.The four sides join tightly to the face; Hence, the protective mask KN95 avoids unfiltered air directly entering into.
- ✔Application:Keep your mouth, nose and chin covered and protected when you go to crowded public places and enclosed public spaces. This KN95 masks are good for transport drivers, taxi drivers, media reporters, couriers, etc.Which can be applied in home, office, school, park, playground, indoors, outdoors and more congested and busy public places.
- ✔A lightweight and foldable design makes these face masks easy to fold into your bag, easy to incorporate and save space. Our breathable face mask KN95 can greatly improve the permeability, and to make wearing and exhaling more comfortable.They are a great choice to take along when you will be among people and want to stay safe.
- Disclaimer: “This KN95 mask is NOT an N95 mask. For more information about KN95 masks please see the following before you purchase: amazon.com/AboutKN95s”
- Hand protection – Avoid sanding down your fingers or splashing chemicals on your hands by wearing a pair of work gloves. Even paints that don’t contain toxic chemicals can irritate or cause reactions to your skin.

- 【Superior Hand Protection】 The microfoam nitrile coating on the palm and fingers provides reliable grip and control in damp, wet and oily conditions, With these coated work gloves, you can keep your hands clean and protected from oil and grease. It's a great choice for anyone who needs reliable hand protection for general handling tasks.
- 【Comfortable, Breathable & Flexible】13 gauge knit nylon seamless shell and microfoam technology coating offers increased comfort and a 360 degrees of breathability, making the safety work gloves more breathable and keeping your hands dry at all times. Ergonomic designed comfortable 3D snug fit into all fingers, improving fingertip sensitivity and flexibility, wearing maxiflex work gloves can also use your smartphone or other touch screen devices.
- 【Multipurpose】 Machine washable for easy cleaning and maintenance, quick drying. NEOTRIL rubber coated work gloves are perfect for light duty work,ideal for applications in automotive, construction, logistic, warehouse, moving, handling, cleaning, driving, gardening, assembling, gardening and DIY duty works.
- 【More Details】CE certified with EN388:4131 (Abrasion:4 Cut:1 Tear:3 Puncture:1); Knit wrist design helps prevent dirt and debris from entering the mens work gloves.
- 【Care Instructions】Size available from S to XL,different bulk pack (3/6/12/36 pairs); Recommend washing gloves in tempered water not exceeding 104°F or 40°C. Wash in a 5-10 minute cycle time, Rinse in cold water, Tumble dry at temperature not exceeding 104°F or 40°C.
How to Use an Orbital Sander on Cabinets

Now that you’ve gathered your protective equipment, tools, and materials, we can begin sanding. Just follow these steps:
- Start by taking apart your cabinet to make it easier to sand down every nook and cranny. Take the doors off the hinges, then unscrew the hinges and any knobs or handles.
- You might find it useful to draw a diagram of your cabinet’s configuration to help you remember where every piece goes. You can number each hinge, knob, and door and write the number both on your diagram and in a hidden place on the piece itself. Taking photos of the process with your phone can help you remember the configuration even better.
- Remove the previous finish or paint. If the cabinet is covered in an oil-based coating or paint, rub on a coat of paint stripper, wait till it clumps, then use your putty knife to peel off the clumps. Some finishes soak deep into the wood; it’s better to just sand those off. If your cabinet is unfinished, use your degreaser to wipe down the surface and get rid of any accumulated residue.
- If there are any dents, knots, or pores on the surface, fill them with your wood grain filler or wood putty before sanding.
- Now, let’s start sanding. If you need to remove a coat of paint, begin with your 100- or 120-grit sandpaper. If not, start with your 180 for most jobs. If you’re sanding down a new cabinet fresh from the factory, you can even start with a finer grit like 220.
- Move your orbital sander using even strokes and a smooth motion. It’s easiest to follow the grain of wood whenever you can. Keep the orbital sander moving continually to avoid marking the surface or digging a sander-shaped dent in the wood.
- Pause every so often to tap the accumulating dust off the sander. If sawdust begins to pile up, use your dust vacuum to remove it.
- If you want to do a final round by hand to get an impeccable surface, use the 220 sandpaper. A final round of hand sanding can help you reach all the little crevices and cracks.
- Before moving on to the finish, take a minute to tidy up. You don’t want any particles stuck in your varnish or paint, so use a brush to loosen any sawdust left on the cabinet, and then vacuum it up. Give every surface a final once-over with your tack cloth, and you’ll be ready to start finishing.
- Use your brush or roller to apply your favorite finish to the cabinet. If you want to paint the cabinet, begin by applying a primer, and then do a lightning round of hand sanding before applying the paint. Use the 220 sandpaper for this part, and make sure you file down any accumulated primer along the edges or inside the grooves.
- Let the finish dry before you start putting the cabinet back together. Once the surface no longer feels sticky, begin the reassembly. Use your numbered diagram or photos to put the cabinet back together in the exact reverse order of your disassembly process.
Enjoy your freshly sanded and finished cabinet!