


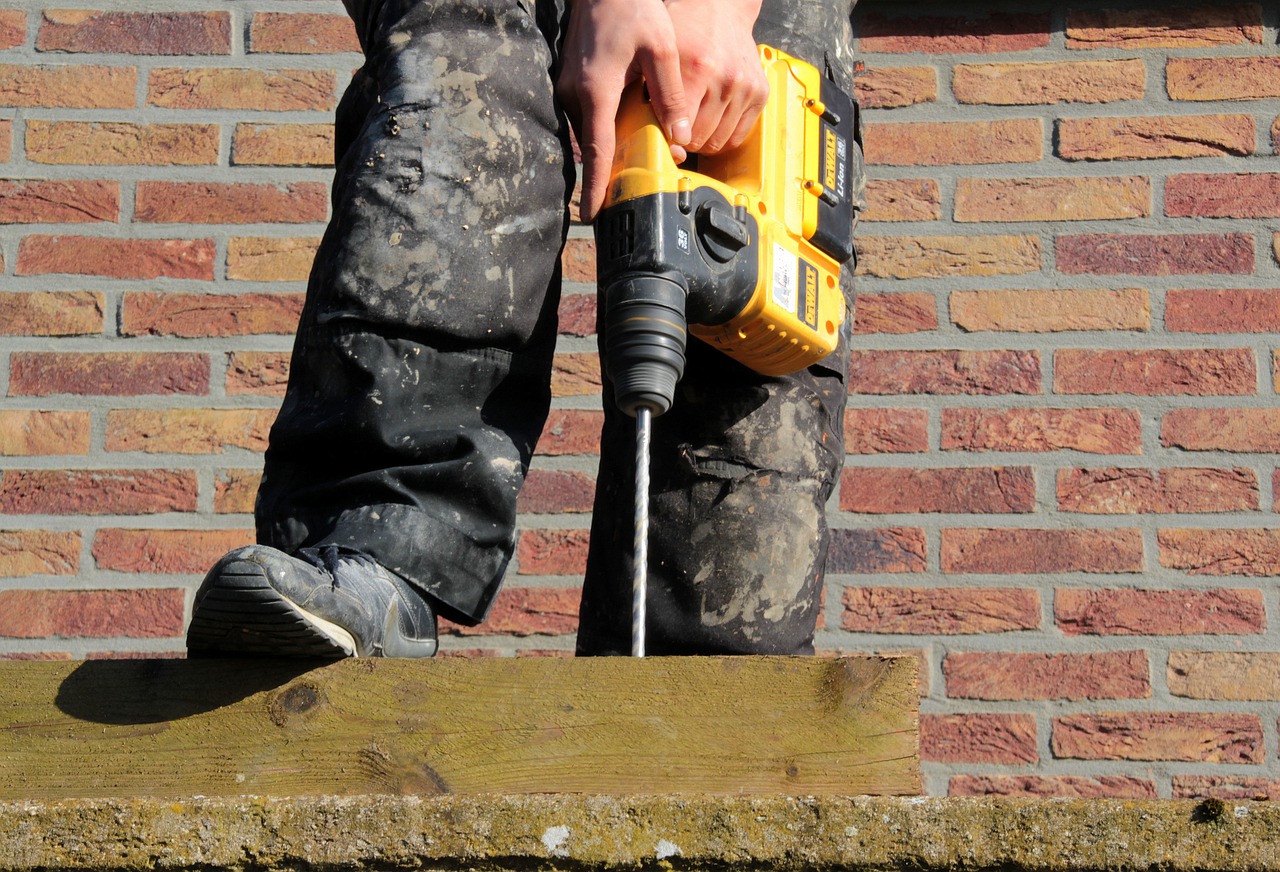
Even if you use them right, your drill bits will slowly get duller over time. As the cutting edges wear down, drilling will get harder and take longer. Unevenly worn drill bits can spin out of control and damage your materials or even injure you.
Keeping your drill bits’ cutting surfaces crisp and even will make your work easier and more consistent. You don’t need to purchase specialized tools to do so, either — if you have a Dremel, that’s all you need! This guide to sharpening drill bits will show you which parts of your drill bits can become problematic and give you step-by-step instructions on how to use your Dremel correctly to keep them razor sharp.
What Is a Dremel?
A Dremel is a brand-name power tool that uses a compact yet robust motor to provide electric rotation to any number of plug-and-play accessories. It’s small enough to hold in your hand like a pencil or wield like an exceptionally hardcore electric shaver, but it’s also strong enough to sand hardwood, polish rocks, and grind down metals.
No products found.
The variable speed motor in most Dremels can spin at up to 35,000 RPMs, while the tool’s petite dimensions let you get close to your subject and focus on precision. It won’t replace your other sanders and grinders, but it can help you do detailed work that those behemoths have a harder time with.
Some models come with a Dremel sharpening kit that can include as many as 40 different accessories to plug into its chuck. Besides the many carving and grinding accessories, you can find attachments to extend the shaft, guard your hand from flying debris, or even trim your pet’s nails.
Start With a Visual Check to Diagnose Your Drill Bit’s Problem


Despite their tiny size, drill bits have more parts than you might think. If something feels wrong with a certain drill bit but the problem isn’t immediately obvious, begin your diagnosis by looking closely at the tip. There can be a number of reasons why the bit you want to sharpen isn’t cutting precisely and smoothly. These may include:
- A broken or chipped tip
- A blunt or deformed chisel edge
- A point angle that’s too narrow or too wide
- Various other angles with uneven sides
If you’re not sure what the edges and angles should look like, compare the suspicious piece to your more effective drill bits.
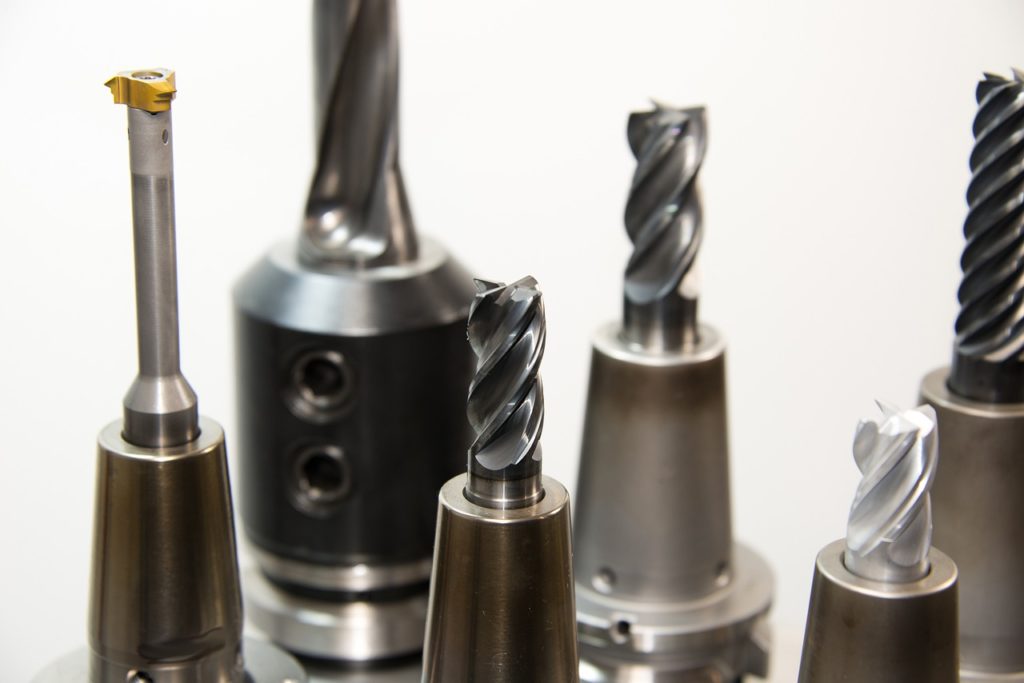
A standard twist drill bit has two flutes. The flutes are the twisted grooves that run the length of the drill bit’s body. You can also find straight-fluted drill bits, although these are rare.
Your drill bit’s point is the vaguely cone-shaped tip formed by the end of the flutes. The chisel edge is the sharp line at the dead center of the point that does the initial cutting. If the chisel edge looks rounded or has lost its crispness, that’s where you should focus your sharpening.
The angles of the flat sides of the chisel edge are known as the heels. Check the heels of your problematic drill bit to make sure they’re similar to the angles on your other working bits.
Next, check the lips. These are the primary cutting edges that run straight from the tips of the flutes toward the tips of the chisel edge. A standard twist drill bit with two flutes will have two lips. The lips work together to make uniform holes when you drill. If the lips have different angles or one lip is duller than the other, your bit won’t be able to cut straight, and the holes you drill will end up crooked.
Finally, check the point angle. This is the angle formed by the two lips. In general, when you drill into softer material, you should use a drill bit with a steeper angle. Harder materials need drill bits with flatter point angles. When you use a drill bit with a point angle that’s too wide or too narrow for the material you’re drilling, the lips won’t be able to properly support the chisel edge. This can slow down your drilling or even end up chipping the bit’s edges.
Most standard drill bits use a point angle of 118 degrees, or 59 degrees for each lip. These are generally used for drilling into softer materials, including malleable metals like aluminum and brass. For drilling into harder metals like stainless steel, you’ll generally use a drill bit with a 135-degree point angle. As a 135-degree point angle is a bit flatter than a 118-degree point angle, more of the lip edges will touch the metal sooner, providing more force and support.
Confirm Your Diagnosis by Drilling a Test Hole
Your standard twist drill bit begins its penetration with the chisel point. As the point spins down into the material you’re drilling, the lips start to scoop away chips of the material, funneling them through the twisty flutes and away from the starter hole. The hole is then widened to the correct size by the flutes’ outer edges, which are called the margins.
As your drill bit gets duller and more uneven, it will start to heat up more every time you use it, which will wear it down even quicker. As the wear increases, the force and torque you’ll need to drill down smoothly will also increase. The more thrust and torque you apply to it, the more likely it is to break.
If your visual examination was inconclusive or you’d like to double-check what you saw, drill a test hole to try to find which of the many edges and angles aren’t performing up to par. Pay attention to the size and shape of the test hole, the difficulty of penetration, and any weird noises coming from the bit.
- If your bit drills holes that are too large, the cutting edges may have unequal angles or lengths.
- If the holes you drill look rough rather than smooth or the drill bit squeals loudly when drilling, your bit’s lips or margins may be dull.
- If drilling feels more difficult than usual, the point angle might be too wide.
- If your drill bit’s point is developing nicks and chips, the point angle might be too narrow.
A Few Safety Tips for Sharpening Drill Bits

Before you start sharpening, keep in mind that your hands, eyes, and ears may get dangerously close to a number of sharp or hot objects moving at high speeds. Besides the lightning-fast rotation, sparks and metal chips can fly around at random, so it’s important to use extreme care.
Even for quick polishing jobs, you should wear hand, eye, and ear safety gear to protect yourself from debris, sharp edges, and noise. Use a sturdy pair of work gloves, safety glasses, and earmuffs or ear plugs, and be sure you can quickly reach your machinery’s off switch in case of emergency.
Prepare Your Dremel
For small sharpening jobs, use the Dremel’s circular sanding drum attachment. Most drill bits are small enough to pair well with the drum’s quarter-inch sanding band, but larger bits may need the half-inch band.
Dremel sanding bands come with different grades of grit for different purposes. Lower grit numbers mean coarser sandpaper.
No products found.
Drill bits with extremely rounded edges will need a sanding band around 80 to 120 grit. If you only need a light polishing job or your drill bit is really small, try starting in the 180-to-200 range. For drill bits with diameters smaller than one-thirty-second of an inch, start with 320 grit. If your bit is larger than five-eighths of an inch, it’s probably quickest to use a bench grinder.
Use a Guide Block to Measure the Angles
The ideal point angle of your bit depends on what material you’ll be drilling:
- For wood and plastics, use a 90-degree angle.
- For brass, bronze, aluminum, and cast iron, use a 118-degree angle.
- For steel, use a 135-degree angle.
To get the point angle exactly right, you may find it helpful to make a guide block out of wood with grooves or cuts at the angles you need. Start with a wooden block about 4 inches long. Use a protractor and your Dremel’s carving attachment to mark the appropriate angles on different faces of the block.
Remember, the point angle involves both sides of the drill bit, but you’ll only be sharpening one side at a time. To make sure you get both sides even, the grooves you cut into your guide block should be half the total point angle:
- For a 90-degree point, mark a 45-degree angle.
- For a 118-degree point, mark a 59-degree angle.
- For a 135-degree point, mark about a 67-degree angle.
Now you can line up your guide block to your drill bit to get an idea of what the correct angles look like.
Other Tools and Materials You’ll Need
Besides your drill bits, Dremel, Dremel sharpening kit, guide block, and protective equipment, here are a few tools and materials to prepare beforehand:
- Bench vise – You’ll need a simple clamp to fix your drill bit in place so you can focus on sharpening with the Dremel.
No products found.
- Magnifying glass – All the parts and angles on many drill bits can be too small to accurately assess with the naked eye if you want optimal precision.
No products found.
- Bucket of water – Surfaces can heat up fast when you grind metal. Keep some water nearby in case you need to cool things down.
Sharpening the Drill Bits With Your Dremel Tool
Don’t overdo your sharpening. You want to remove just enough metal to get the edges sharp but not too much that the bit becomes unusable. Your Dremel strokes should feel like kisses grazing the surface of the bit. If you push the Dremel too close or leave it in contact with the bit for too long, you’ll take off more metal than necessary and heat up the bit, which can compromise its integrity.
- Clamp the bit tightly into place with your bench vise. Make sure the face you want to sharpen is oriented correctly. If you’ll be holding your Dremel with your right hand, the first side of your first dull surface should face right.
- Use your Dremel and its sanding drum attachment to slowly kiss away a minuscule layer of metal from the first uneven or dull edge. Start each stroke at the tip of the edge you want to sharpen, and swipe the Dremel away from the edge toward the body of the bit. Use lots of repeated light strokes.
- When sharpening the lips, place your guide block beside your clamped drill bit every once in a while to check the point angle.
- Prolonged sharpening will start to heat up the metal bit. Cool it down occasionally with water from your bucket to avoid overheating, discoloration and breakage.
- When the first edge looks nice and sharp and the angle looks just right, turn off your Dremel and loosen your clamp. Rotate the drill bit exactly half a turn in the clamp so you can sharpen the other side. Keep in mind that the angles need to be identical on both sides. Some experts prefer to sharpen each side a little at a time, rotating the bit 180 degrees after every few strokes.
- Use your magnifying glass to inspect the sharpened surfaces. Rounded edges tend to cast glints of light, so make sure all the edges look crisp and sharp. Check that the lengths and angles of each lip and heel are all even and that the total point angle isn’t too narrow or too wide.
- When all the offending edges look sharp and even again, drill a final test hole to confirm that the bit cuts smoothly and correctly. It should bite into the material without too much pressure and fling a tiny fountain of chips when you pull it out. If you don’t hear any squealing, see any wobbling or feel any excessive heat, you’ve done a good job.


